
How to Sign Up for Dreamhost
You picked your niche.
You have your blog name.
Now it’s time to make it official and get your blog actually live on the internet.
This is the step that feels scary but really isn’t.
I promise you can do this even if you are not a tech person.
I’ll walk you through everything step-by-step.
What You Need to Get Started
To get your blog online you need two things:
- A domain name — this is your blog’s address on the internet. The URL people type in to find you. (yourblogname.com)
- Hosting — this is what makes your blog actually live online. Think of it like renting a little piece of the internet where your blog lives.
I recommend Dreamhost for beginners as a blog host. It’s affordable, beginner friendly, and getting WordPress installed is basically one click through a on-page wizard the system will walk you through.
I’ll show you exactly how.
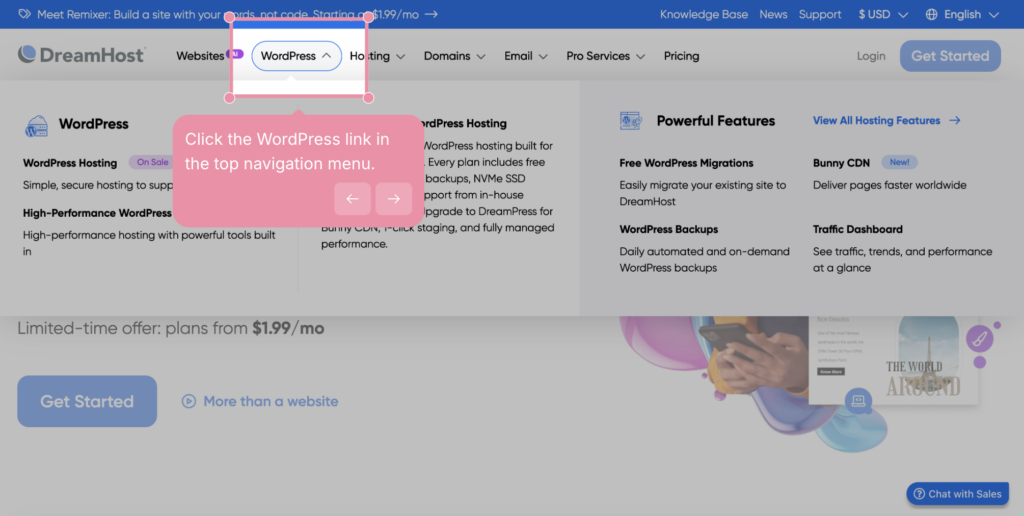
Step 1 — Sign Up for Dreamhost
Head over to Dreamhost and click on WordPress. From there choose the first plan which is the WordPress Hosting Launch Plan option.
You’ll see a couple of plan options. Here’s how to think about it.
Which plan should you pick?
The WordPress Hosting Launch Plan is what I recommend for beginners. It lets you host up to 25 websites all for one price and includes 3 months of a free branded professional email.
Here’s how the pricing works:
- 1 year plan — $34 for the year ($2.89 a month). Great if you want a lower upfront cost while you’re getting started.
- 4 year plan — $95 for four years ($1.99 a month). The better deal if you know you’re serious and want to lock in the lowest rate long term.
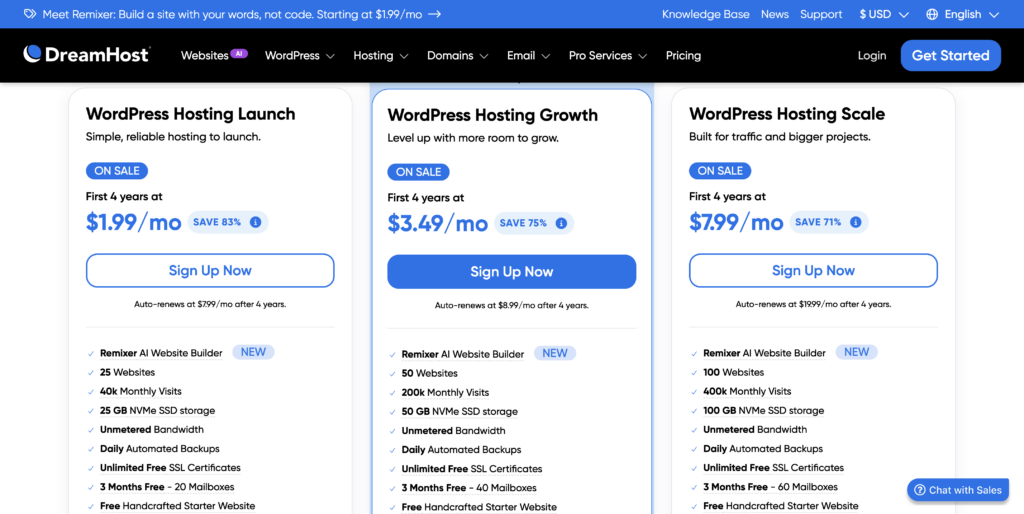
Both are a solid investment for what you’re building. If you want the best deal available use my link to lock in your pricing.
Not sure which to pick? Go with the 1 year plan if you want to just get started. Go with 4 years if you’re ready to commit and want to save money in the long run. Personally, I’d go with the 4 year plan as it’s a better deal financially and you will be able to see your blog grow.
There are two other plans:
- The WordPress Hosting Growth Plan – This will give you 50 websites, more storage and monthly visits.
- The WordPress Hosting Scale Plan – This will give you 100 websites, 100 GB of SSD storage and 400k monthly visits.
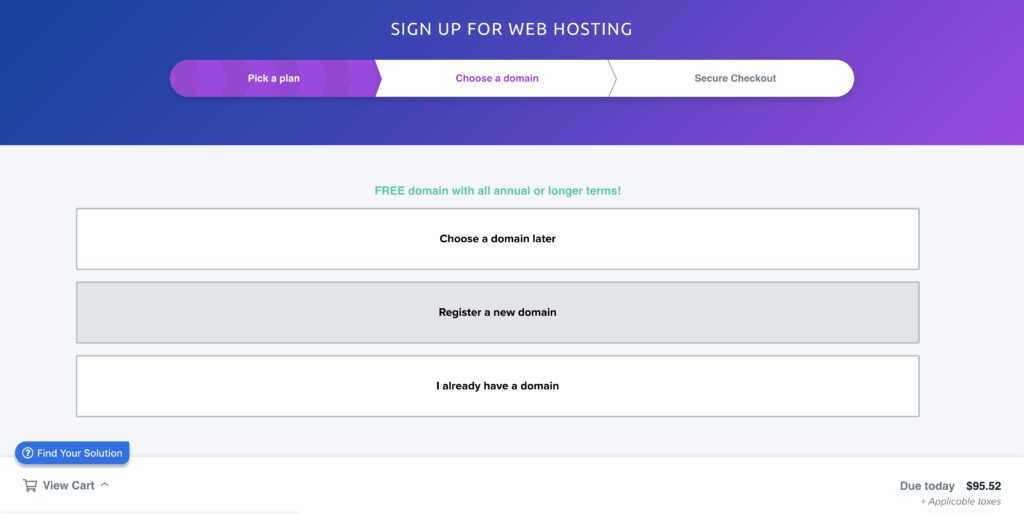
Step 2 — Choose Your Domain
During checkout Dreamhost will ask if you want to register your domain name. You have a few options here:
- Register a new domain if you already know your blog name
- Use a domain you already own
- Choose your domain later if you’re still deciding
If you already know the name you want go ahead and claim it right here.
Your first year domain price is included with your plan so there’s no extra cost.
If you’re still not sure that’s okay too.
You can skip this for now and register your domain when you’re ready.
Just make sure to come back and do it within 30 days so you don’t miss out on the free domain included with your plan.
Don’t forget to read my blog post about selecting a blog name if you are stuck on this step.
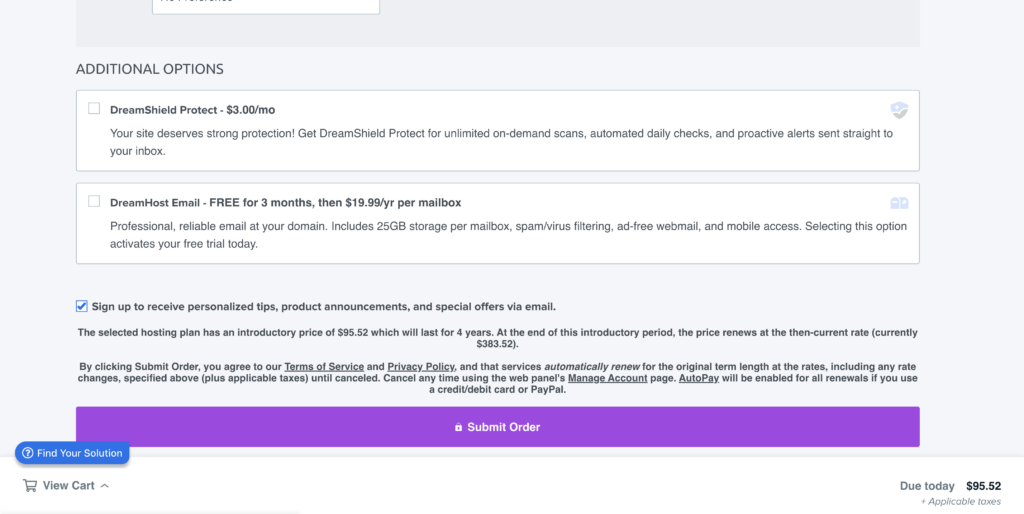
Step 3 — Complete Checkout
After choosing your domain you’ll set up your account and pay.
Dreamhost may show some extra add-ons during checkout. You can keep it simple and uncheck those those for now.
If you’re starting your first blog just focus on getting hosting set up first.
Once you hit “Submit Order” your blog is officially in motion.
Step 4 — Install WordPress
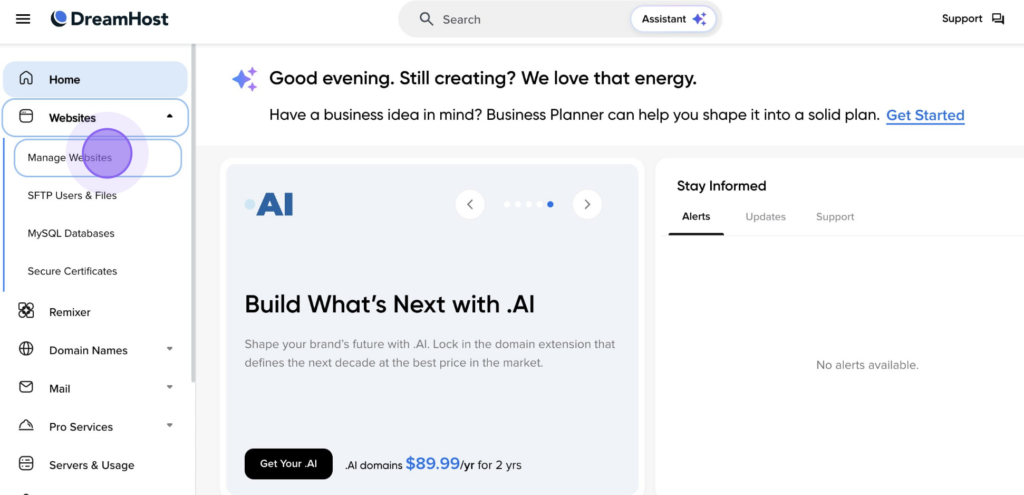
Now, check your email.
There you’ll have an order confirmation from Dreamhost with your account login details.
Head to Dreamhost.com and log in.
Once you’re in click on Websites in the left menu, then Manage Websites.
Click the blue Add Website button and Dreamhost will launch a simple wizard that walks you through everything to setup your site and install WordPress.

Follow the prompts and WordPress will be installed on your domain in just a few minutes.
This is what people mean when they say one click WordPress install, it really is that easy.
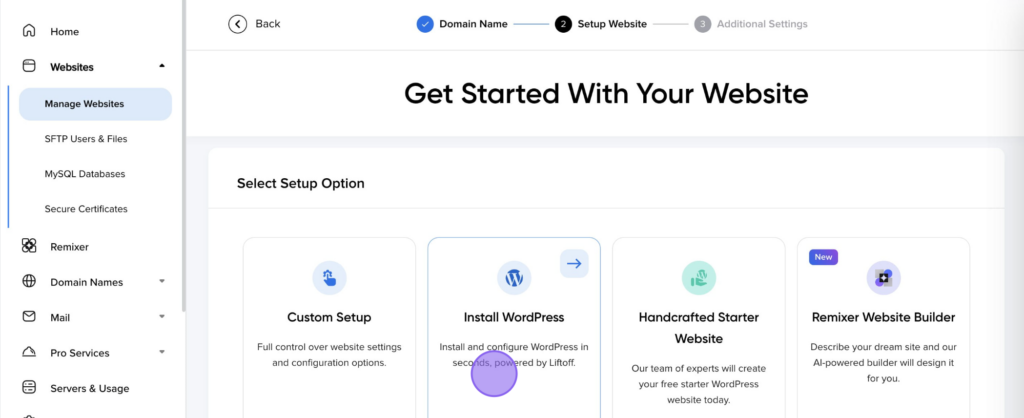
Once the install is complete your blog is officially live on the internet.
You Actually Did It
That’s the biggest step right there.
Your blog is no longer just an idea sitting in your Notes app. It’s a real website on the internet with your name on it.
Take a second to appreciate that because a lot of people never get here.
They think about it, they plan it, they make lists, and they never actually start. You did!
What’s Next?
Right now your blog is live but it doesn’t have a look yet. In the next post we’re going to log into WordPress for the first time, get your basic settings sorted, and get you familiar with your dashboard.
Drop a comment below when you’ve signed up, I love hearing when someone takes this step!