How to Start a Blog After Work (Beginner-Friendly Guide)
Have you ever felt that starting a blog is too overwhelming?
One minute you are excited about the idea.
The next you are trying to pick a topic, choose hosting, understand WordPress, and figure out if you need a logo before you even begin.
But guess what? You don’t need to do all of that to start your blog!
The internet has a way of making something so easy seem super confusing.
If you want to start a blog while working full-time, the goal is not to have everything figured out on day one.
Your goal is to get your blog online, keep it simple, and start building something that can grow over time.
In this guide, I’ll walk you through how to start a blog step-by-step, what you actually need, what you can skip for now, and how blogging can eventually make you money.
How I Got Into Blogging
I didn’t get into blogging with some big plan.
I just wanted something of my own.
At the time, I was working full-time and looking for a way to make extra money online, something flexible I could work on after hours. I didn’t have a lot of time, and I didn’t want to pick a traditional side hustle that would take a lot of time away from my social life.
Blogging ended up being exactly that. And 5 years later it’s the best side hustle I’ve ever found!
There was definitely a learning curve (and a lot of late-night Googling), but once things started to click, I realized how much potential it had.
What started as a side project turned into:
- a way to make extra income
- something I actually enjoyed working on
- and a skill I know I’ll use long-term
Now it’s one of my favorite ways to build income outside of a regular 9-5 job. And that gives you options to build a life you truly love!
Why Blogging Is Worth It
There are a lot of ways to make extra money.
What made blogging stand out to me was that it felt like a way to build something bigger over time.
I wasn’t just looking for a side hustle to fill a few extra hours.
I wanted to create income outside of my 9-to-5.
Something that could give me more flexibility, more breathing room, and eventually more choices in my life.
That’s what made blogging different.
Instead of trading time for one task, I was building content that could keep working for me after I published it.
A post you write today can still bring in traffic, and income, months or even years later.
That does not mean blogging is instant money, because it isn’t.
A lot of bloggers sell that version of it, but that is not how it usually works.
Yes, you can absolutely make money blogging, and it is pretty amazing to see something you built start paying you a paycheck.
But blogging takes consistency.
The real value comes from creating content over time so your work can build on itself and start compounding.
And that part really matters when you are trying to build a life you actually want, not just squeeze in one more thing to do after work.
For me, blogging started as a way to make extra money. But the bigger appeal was what that money could do.
- It could give me more freedom.
- It could support bigger goals.
- It could make everyday life feel less tied to one paycheck.
That’s why blogging felt worth sticking with.
You’re building something that keeps working for you. I have blogs I have setup that even 5 years later continue to run and make me money each year.
How Blogs Actually Make Money
Before getting into the steps of setting up a blog, it helps to understand how bloggers actually make money.
Because blogging is not just about setting up a website.
It is about building something that can turn into income over time.
Most blogs make money in a few simple ways:
- affiliate links
- digital products and/or services
- display ads
- sponorships
If you are just starting out, affiliate marketing is usually the easiest place to begin along with digital products.
That is how I made my first income from blogging, and it is one of the most common ways new bloggers start monetizing their content.
The basic idea is simple:
- You create content.
- People find it.
- And over time, that can turn into traffic and income.
It is not instant, but it builds.
A Few Things to Know Before You Start
Before you jump in, there are a few things that are helpful to keep in mind.
You do not need to have everything figured out before you start.
- You do not need the perfect topic.
- You do not need a perfect plan.
- And you do not need to be super technical.
Most bloggers figure things out as they go.
What you do need is a willingness to learn, some consistency, and enough patience to let it grow over time.
Blogging is pretty simple once you understand the basics.
Blogging takes time to grow, and that is completely normal.
It is not instant, but that does not mean it has to be complicated.
If you keep learning, keep publishing, and give it time to build, your blog can turn into something real.
How to Start a Blog (Step-by-Step)
The good news is, you do not need much to get started.
You just need:
- a computer
- internet access
- a small budget for hosting
- a willingness to keep going, even when you are still figuring things out
If you can carve out a few hours a week to work on your blog, that is enough to get started.
Step 1: Pick a Topic
Before you start your blog, it helps to have a general idea of what you want to write about.
This does not need to be your perfect niche. It just needs to be a direction.
Maybe you want to blog about food, travel, budgeting, DIY, parenting, skin care, or something tied to your job or experience.
You can figure out the details as you go.
If you are stuck here, that is normal. A lot of people overthink the topic before they ever start.
If you want help narrowing down your blog topic or name, fill out my blog planning form here and I’ll help you work through it.
Step 2: Pick a Blog Name
Your blog name does not need to be perfect either.
Try to choose something simple, easy to remember, and broad enough to give you room to grow.
And if you do not know your final name yet, do not let that stop you.
You can still sign up for hosting now and choose your domain later.
That matters because DreamHost gives you a free domain for your first year, and you do not have to hold up the whole process just because you are still deciding on a blog name.
Step 3: Sign Up for DreamHost
This is the step that actually gets your blog online.
To start a self-hosted blog, you need two things:
- a domain name, which is your blog name on the internet (yourdomain.com)
- hosting, which is what makes your site live online (which will be Dreamhost!)
This is the main upfront cost, but it is one of the simplest and most affordable ways to get your blog online.
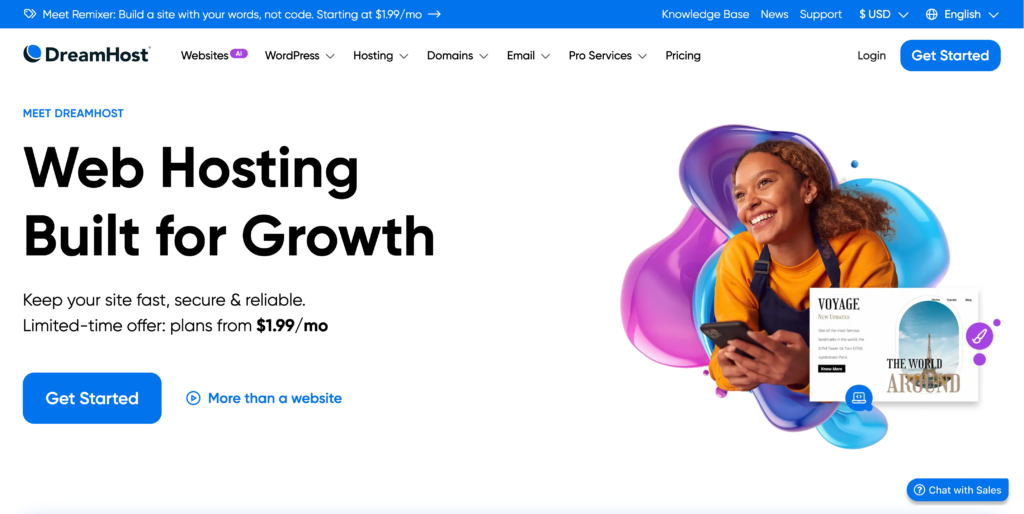
I recommend DreamHost for beginners, and I’ll walk you through which plan to choose, how the pricing works, and how to choose your domain once you’re there.
Click here to go to DreamHost and get started.
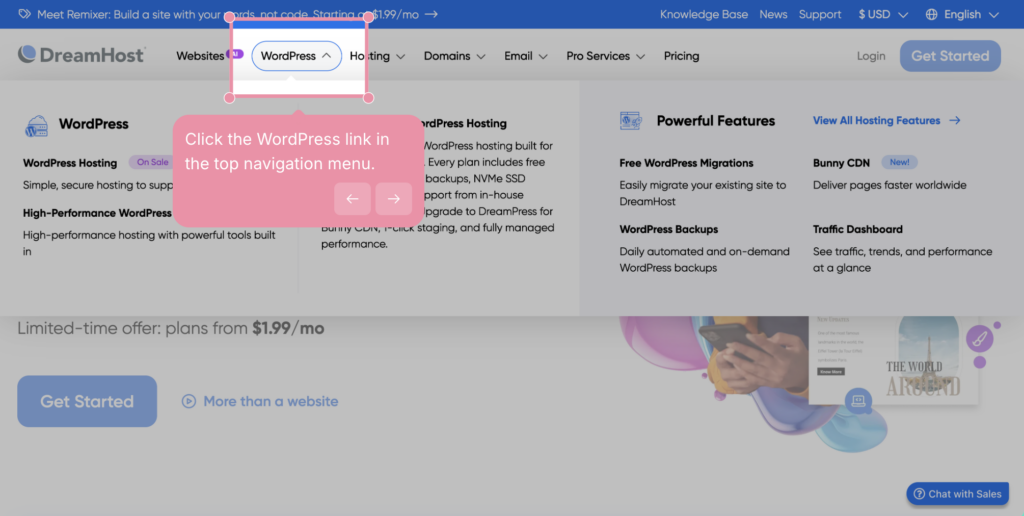
Once you’re there, click on WordPress and choose the basic WordPress hosting option.
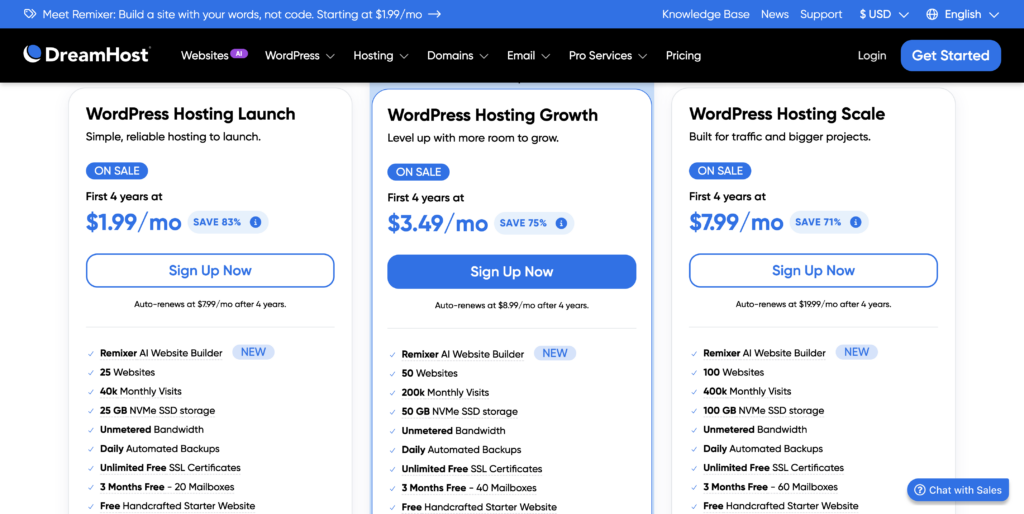
From there, you’ll usually see three main choices.
If you are starting one blog, the WordPress Hosting Launch plan is perfect!
DreamHost has expanded this plan to allow you to host up to 25 websites, with 3 months free of a branded professional email.
This plan starts as low as $1.99 / month for 4 years!
Which Plan Should You Pick?
This part really comes down to your budget and how committed you feel right now.
If you want the lower upfront cost, go with the 1-year plan. You can launch your blog for just $34 for 1-year ($2.89 a month).
If you know you are serious about blogging and want the better monthly price, go with the 4-year plan. This allows you to launch your blog for $95 with a 4-year commitment ($1.99 a month).
Both of the above packages are great if you are looking to start a blog with a small investment.
However, if you are ready to go all in there is a special deal with my link for WordPress plan to lock in your $1.99 / month rate for 4 years.
Step 4: Choose Your Domain
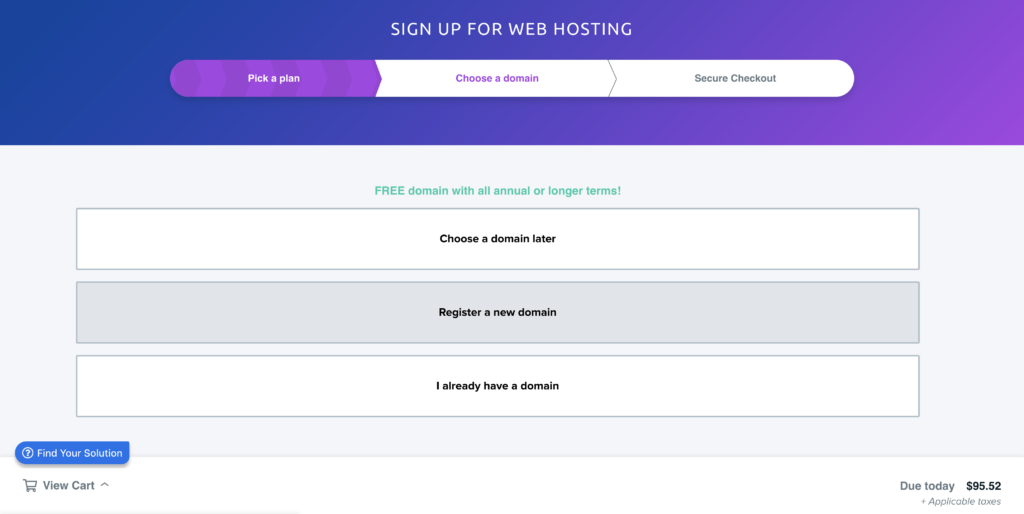
At checkout, DreamHost will ask if you want to register your domain.
You have a few options:
- create a new domain if you already know your blog name
- use a domain you already own
- choose your domain later if you are still deciding
If you already know the name you want, go ahead and claim it.
If you do not, that is okay too.
You can choose a domain name later and keep going.
That means you can still grab your hosting deal now and use your free first-year domain when you are ready.
Step 5: Complete Checkout
After that, you’ll set up your account and pay.
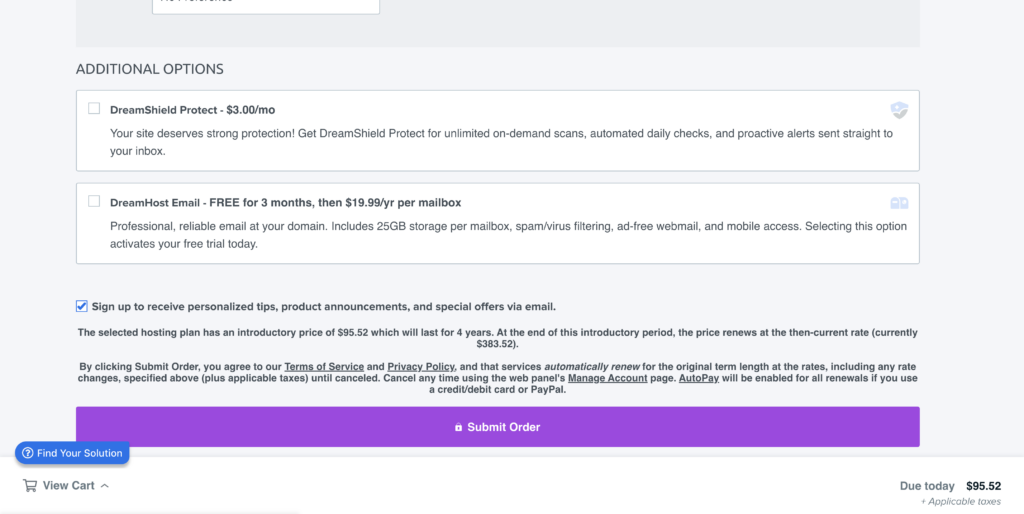
DreamHost may show extra options during checkout.
You can keep it simple.
If you are starting your first blog, I would focus on getting hosting set up first and skip extra add-ons unless you know you need them.
Once you hit Submit Order, your blog is officially in motion.
Step 6: Install WordPress
After signup, you will go to your email to look for your order confirmation and login to DreamHost. Go to Websites > Manage Websites and DreamHost will walk you through getting WordPress installed with a one-click setup!
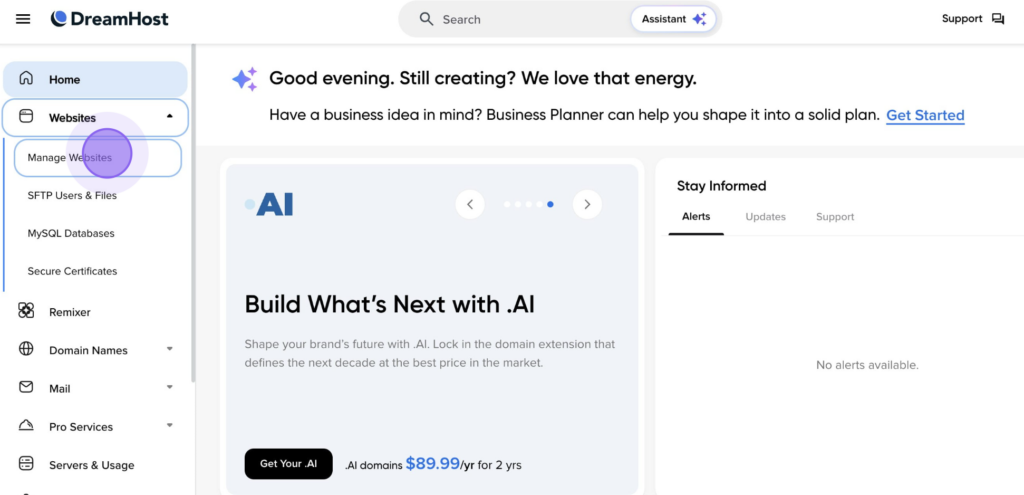
This is the software you’ll use to write posts, build pages, and manage your site.
Once WordPress is installed, your blog is officially live!
And that is the biggest step.
If you used this post to get set up, congrats!
Your blog is no longer just an idea.
You actually started.